ARCore Tutorial
Prerequisites
- A walkthrough of Google ARCore Quickstart,
- An ARCore enabled Android device
- Unity 2017.4.9f1 or later with Android Build Support
- Note Unity 2018.2 has an known bug with Android render target, so it’s not supported. See bug tracking here.
- Android SDK 7.0 (API Level 24) or later
- Accept all the licenses from Android SDK. For example, if you are on macOS:
- $ cd ~/Library/Android/sdk/tools/bin
- $ ./sdkmanager –licenses
- Accept all the licenses.
Getting ARCore SDK for Unity
Download ARCore SDK for Unity 1.4.0 or later
Open Unity and create a new empty 3D project

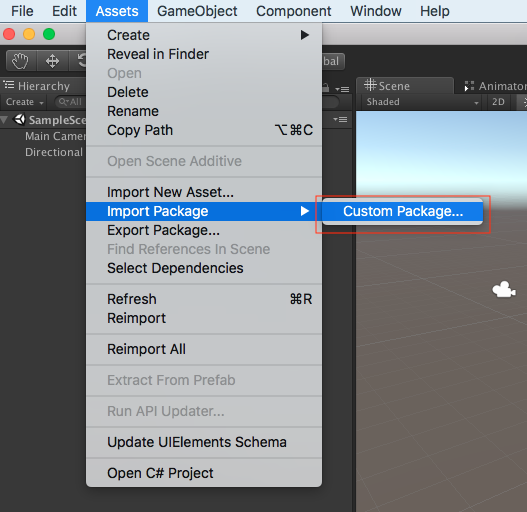
Select Assets > Import Package > Custom Package, use the downloaded arcore-unity-sdk-v1.4.0.unitypackage from your disk.
In the import dialogue, make sure everything is selected and click Import.
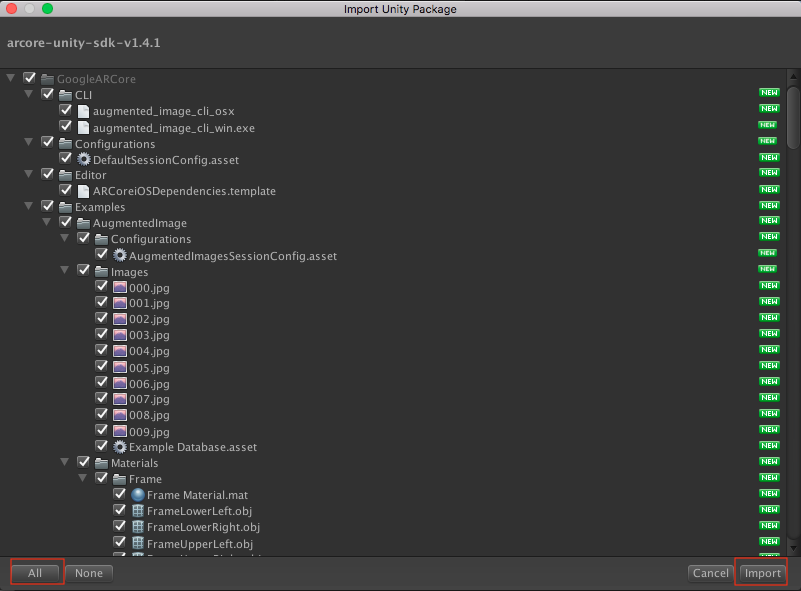
Accept any API upgrades if prompted.
Importing 8i Unity Plugin
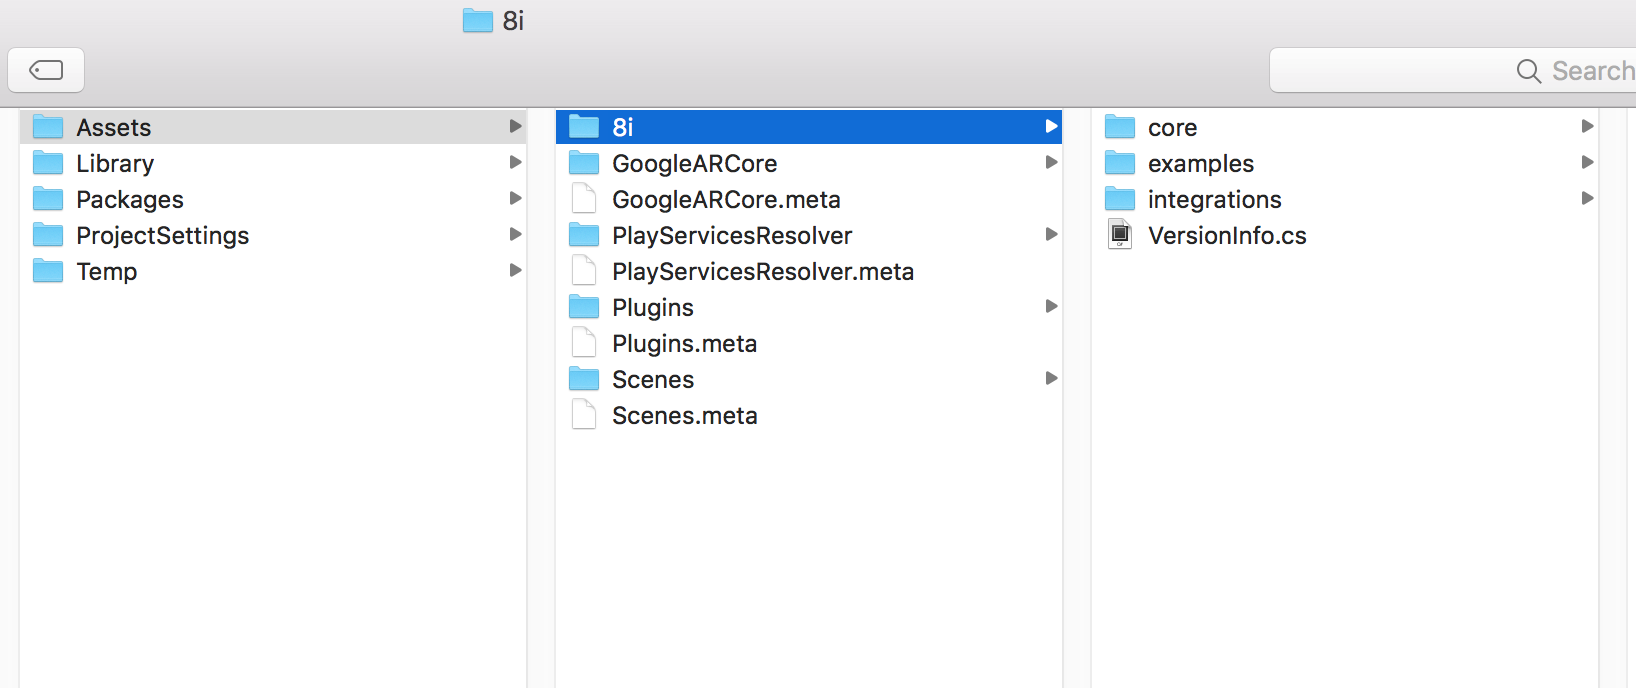
Within the newly created project, extract 8i Unity Plugin into the Asset folder, as stated in Quick Start section.
You should have the directory structure like this:
Fix any warning poped up in 8i Project Tips window, including Android Unpack Scene.

Configure the Unity Project
Open the project in Unity
If you are prompted to upgrade the Unity version, click yes.
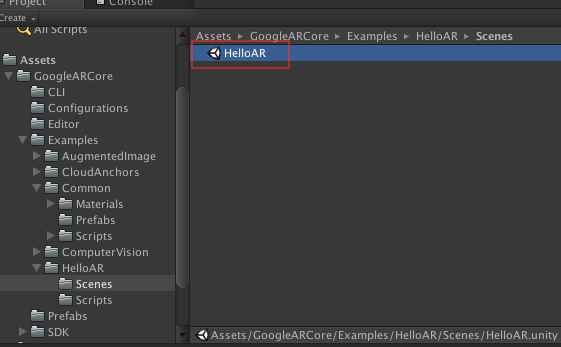
Open scene HelloAR by double clicking Assets/GoogleARCore/Examples/HelloAR/Scenes/HelloAR
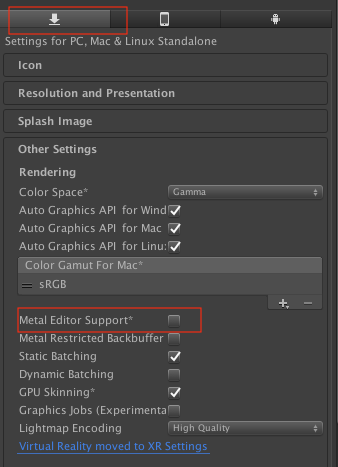
Select File > Build Settings, a build dialogue should come up. click Player Settings… button. A PlayerSettings inspector should appear. In the Inspector window, find Other Settings - Metal Editor Support and unchecked it. This is important for Unity previewing 8i’s hologram content.
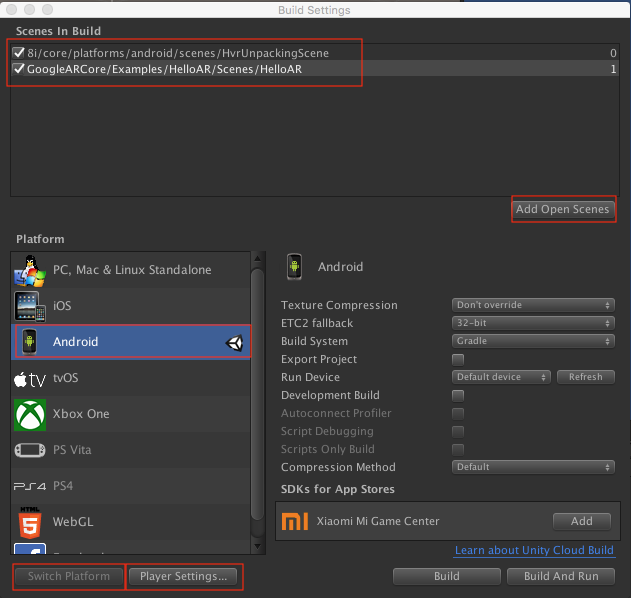
Still in Build Settings dialogue, in Platform choose Android and click Switch Platform button.
Make sure the Platform is switched to Android, and make sure HelloAR scene is ticked on by using Add Open Scenes.
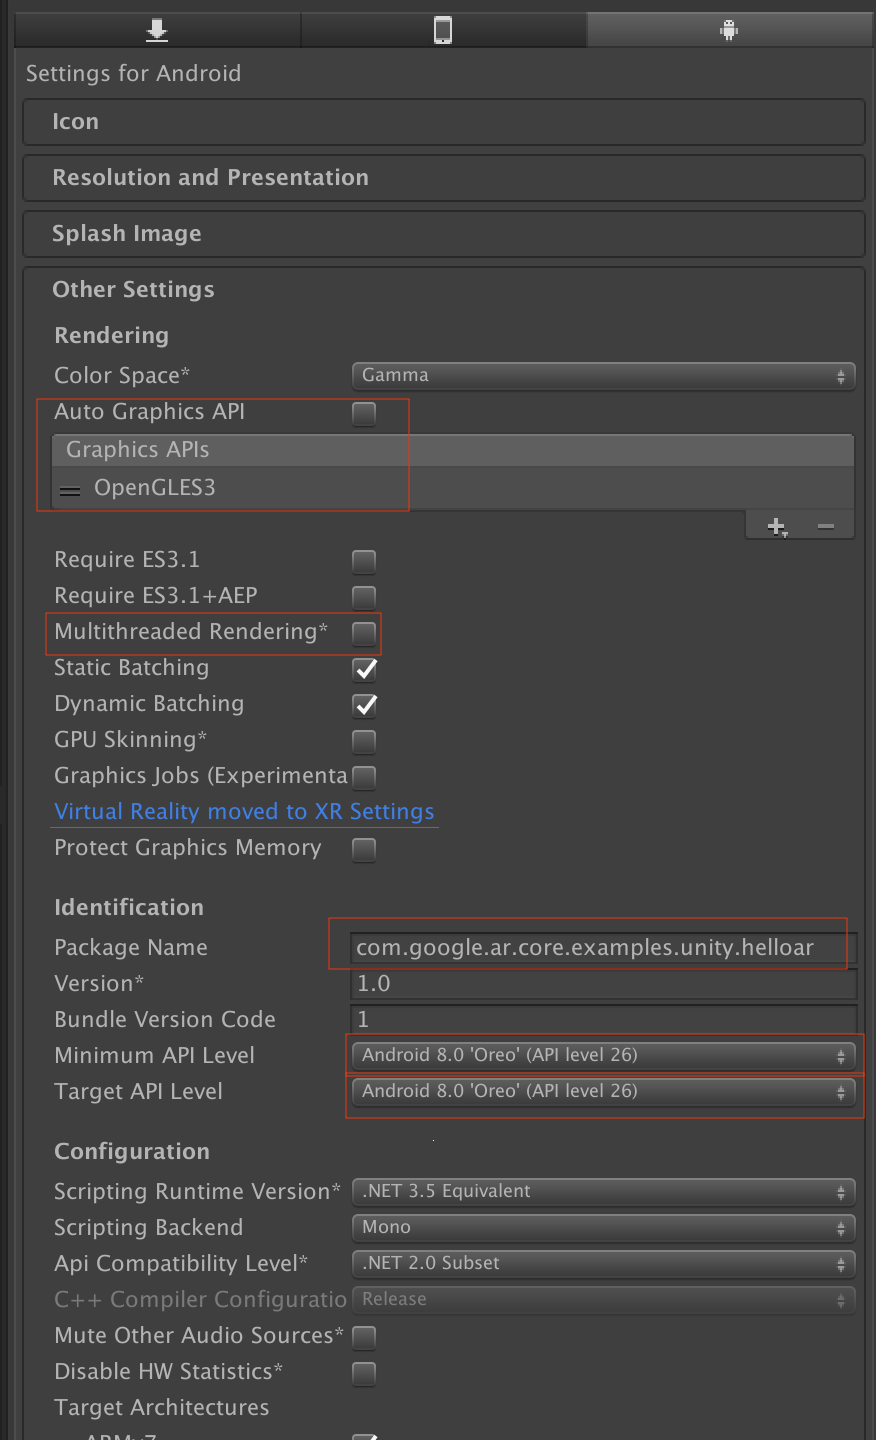
Still in Build Settings dialogue, click Player Settings… button. A PlayerSettings inspector should appear. In the Inspector window, a few fields need to be configured:
Other Settings - Package Name: set to an reversed DNS like name, e.g. com.yourcompany.arsample
Other Settings - Uncheck Auto Graphics API and explicitly set OpenGL ES 3 as the graphics API
Other Settings - Multithreaded Rendering: uncheck
Other Settings - Minimal API Level: set to Android 7.0 or higher. Note you need to have the right version of Android SDK installed and configured in Unity > Preference.
Other Settings - Target API Level: set to Android 7.0 or higher. Note you need to have the right version of Android SDK installed and configured in Unity > Preference.
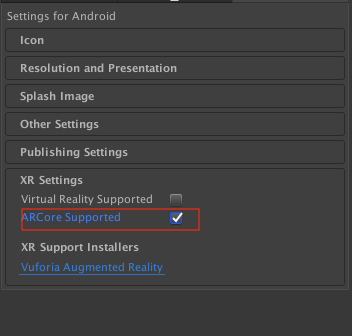
XR Settings - ARCore Supported: tick on
Your First 8i Hologram
For this tutorial, we will edit the HelloAR scene from Google ARCore SDK for Unity’s example.
W will change the original AR object to 8i’s hologram, so that you can place a human hologram onto the augmented world.
To open the scene, find the scene in project and double click the scene.
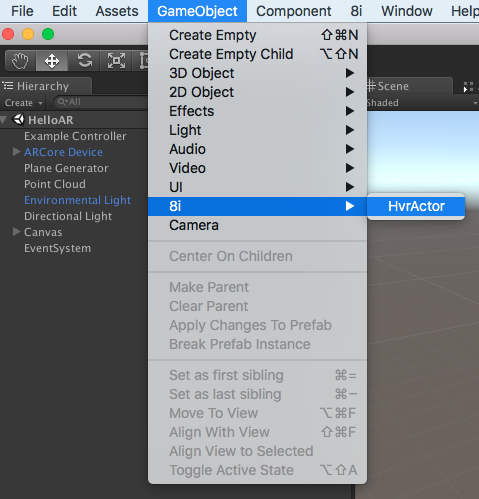
Select menu GameObject > 8i > HvrActor. This will create an GameObject with a HvrActor component attached to it.
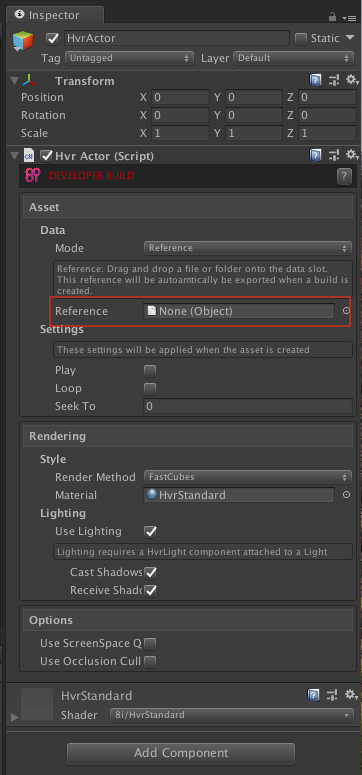
Select the newly created HvrActor object.
There are a few options to note but for now we will just focus on the Asset/Data/Reference field.
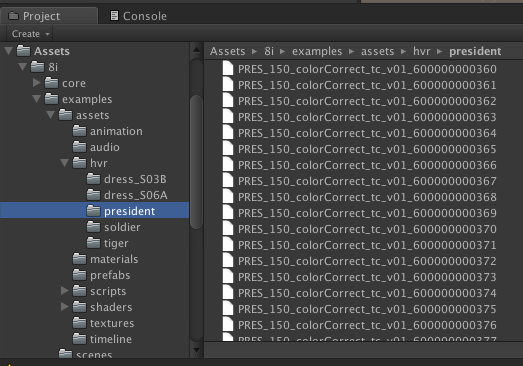
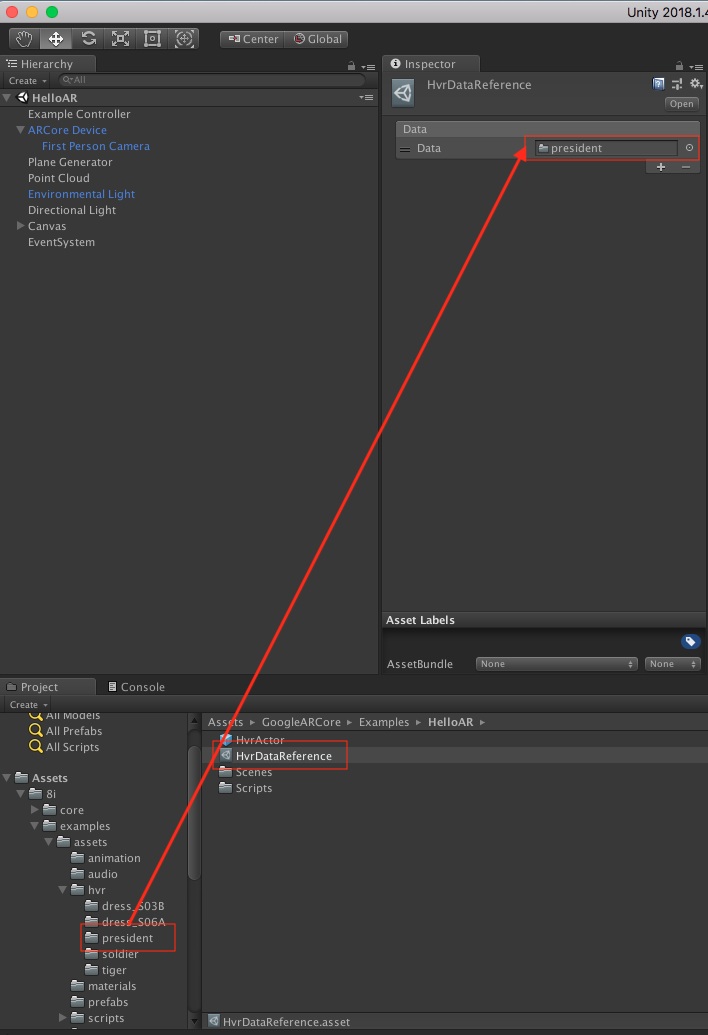
This is the data source that 8i’s hologram engine will read from. As you can see, right now it’s empty. To specify a valid file reference, we can go to folder 8i/examples/assets/hvr, and find “president” folder:
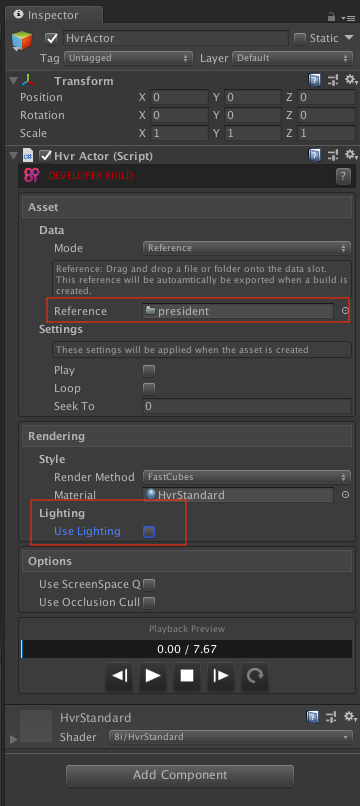
Drag this “president” folder to Asset/Data/Reference field in Inspector panel. To make things even simpler, uncheck the Rendering/Lighting/Use Lighting checkbox:
You should be able to see the hologram has already been shown in the Scene view:

Making A Prefab
Because we want our user be able to drop the hologram whenever he touches the ground, we need to wrap this HvrActor object into a called “prefab” and let our ARKit code know to use it.
Note
Prefabs are an important concept in Unity,
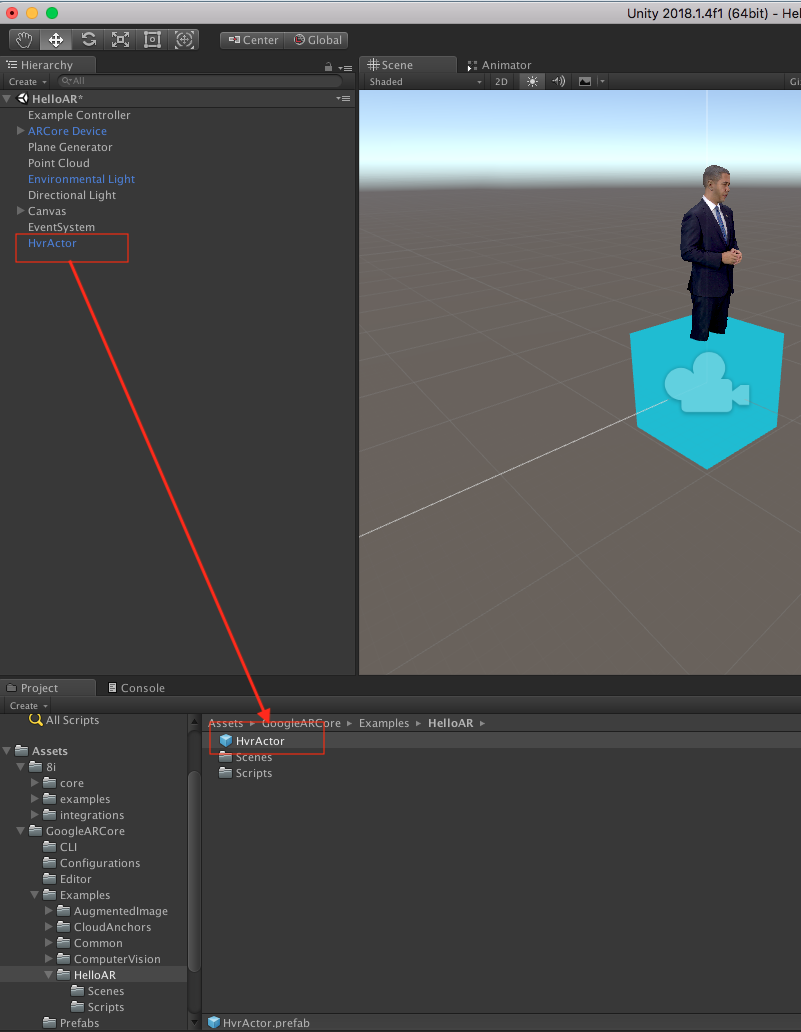
Making sure HvrActor is currently selected, drag the HvrActor object down to a folder in the Project window, Unity will automatically create a prefab for you, and you will see the name of HvrActor turns blue:
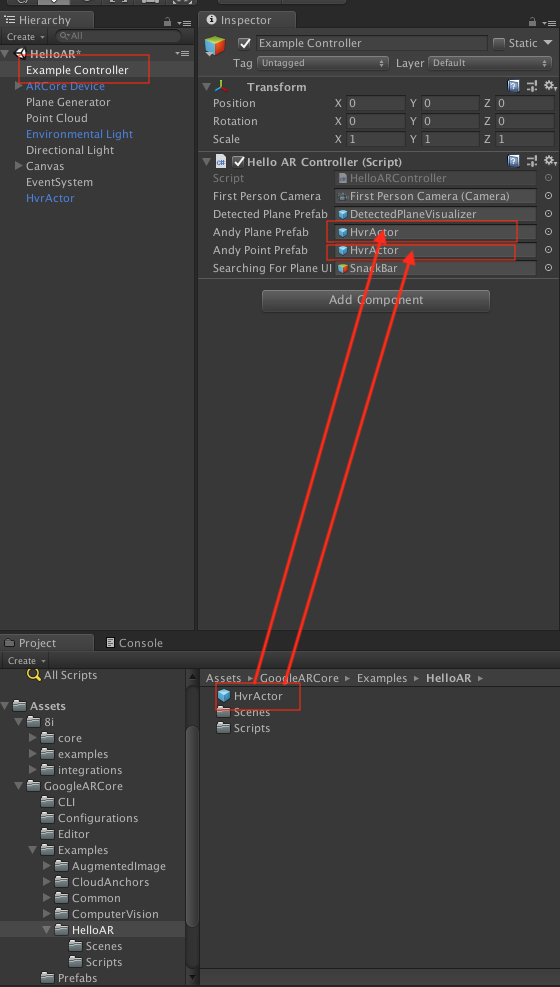
To change the HelloAR scene to spawn HvrActor instead of Andy Android, find Example Controller object in the scene and select it. Drag the newly created prefab HvrActor to Example Controller’s Inspector panel, replace Andy Plane Prefab and Andy Point Prefab with HvrActor:
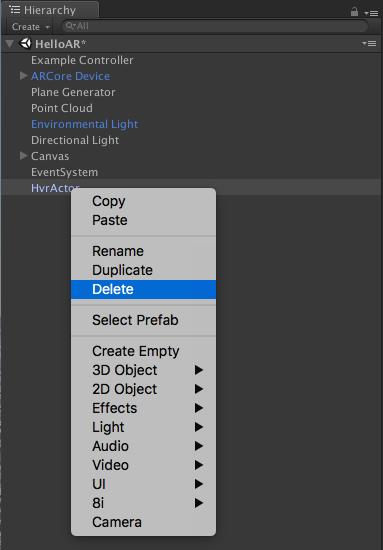
Because we have stored the HvrActor in a prefab it is now safe to delete the HvrActor in the scene. Go to Hierarchy and right click on HvrActor, which should has its name in blue colour, and choose “Delete”.
Save the scene by pressing Cmd+S.
Camera Configuration
Next we need to configure the camera to let it render 8i’s hologram.
Note
This step is required or else you will only be able to view the hologram within the Unity Editor
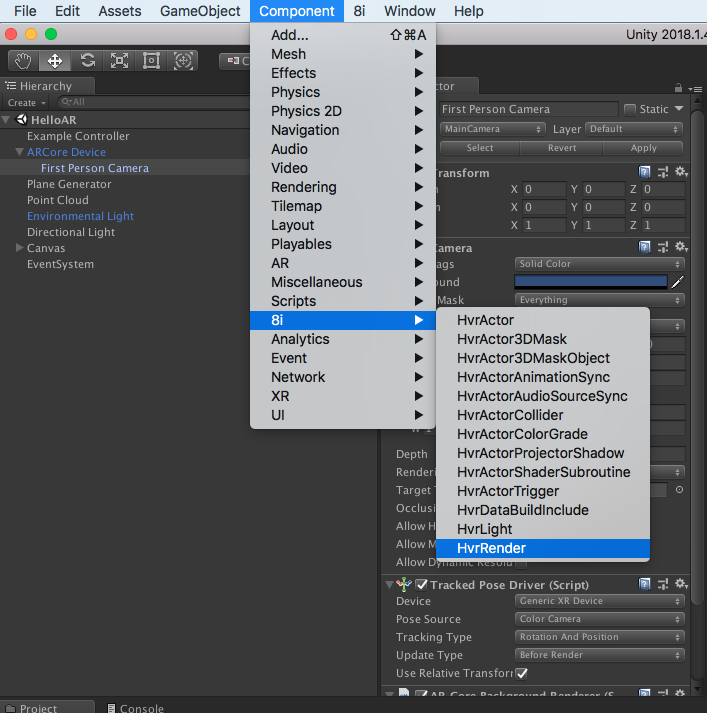
Find the camera object in Hierarchy > CameraParent > Main Camera and select it.
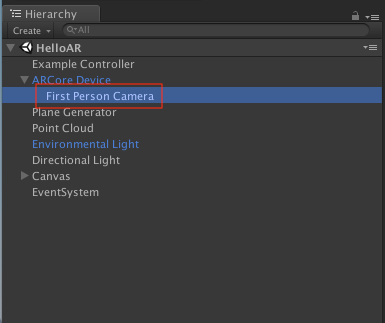
With First Person Camera seleced, In menu choose Component > 8i > HvrRender, this should add a HvrRender component to the camera:
Save the scene by pressing Cmd+S.
Include HVR Data
Before we can build the project, there’s an extra step to do. Because we are using a prefab which means it will be dynamically loaded. We need to explicitly tell Unity to include the data before exporting.
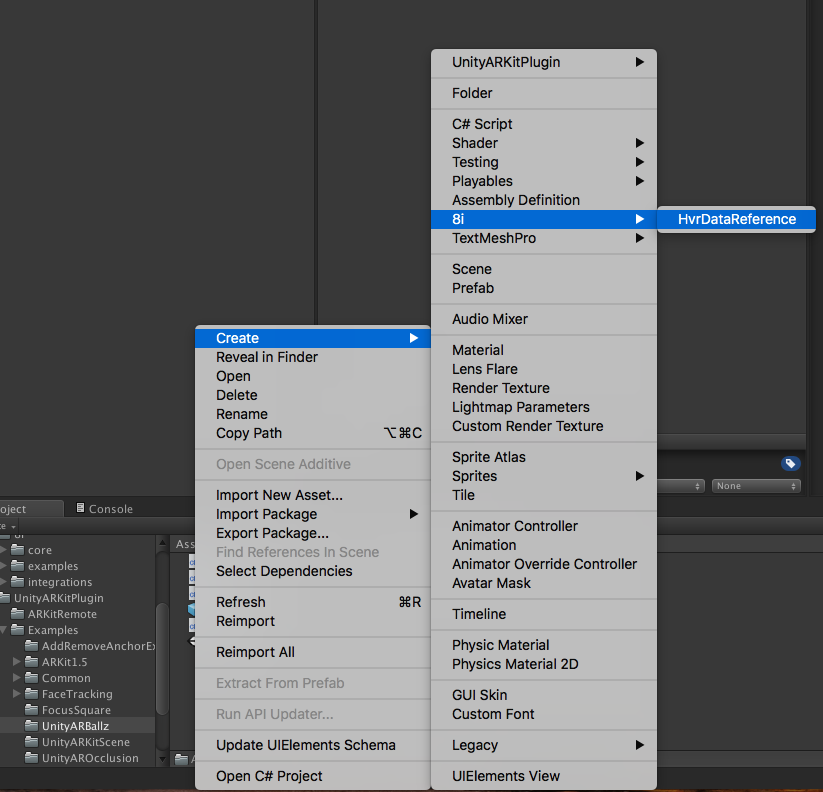
First, right click on the Project window and create an asset of type HvrDataReference. You do it through Create > 8i > HvrDataReference.
After creation, select the asset. Drag the president folder to its data field.
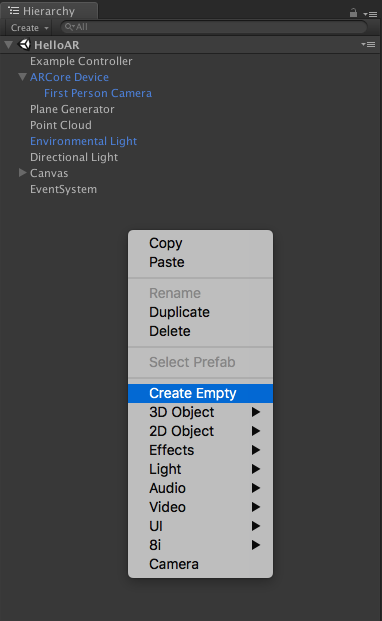
Now we have created and configured the asset on disk. Now we need to include this asset in our scene. Right click in Hierarchy window and create an empty GameObject.
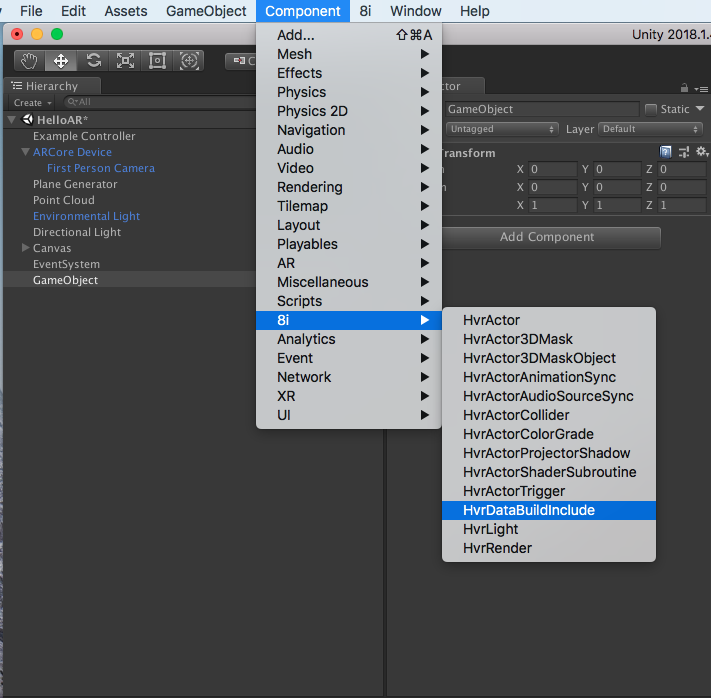
With the empty object selected, attach a component of type HvrDataBuildInclude. You can find it in Component > 8i > HvrDataBuildInclude.
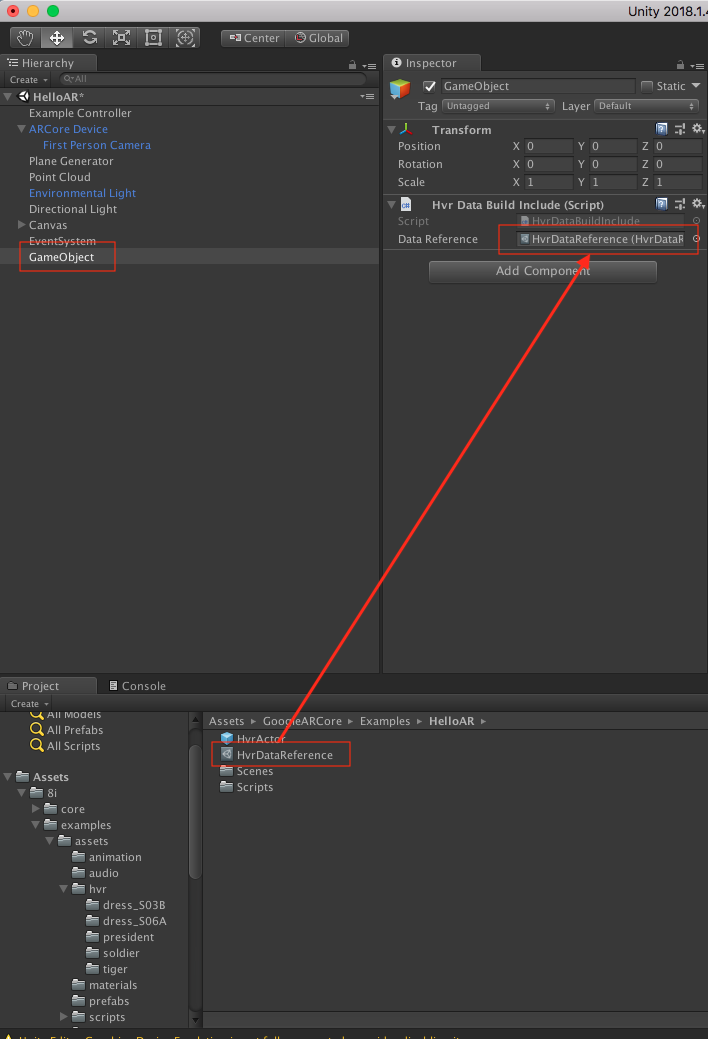
Drag the configured HvrDataReference asset to Data Reference field.
Finally, choose from menu 8i > Android > Prepare Build and click OK if a dialogue prompts. This will prepare and bake the content ready to be submit to Android device. Note this is an Android specific process whenever you changed the dynamic loaded 8i content. You don’t have to do it if no 8i content changed between builds.

Save the scene.
Export and Build
That’s it! It’s time to build an APK and deploy it to the device.
Connect your Android phone to your development machine
Enable developer options and USB debugging on your Android phone. This should be done just once.
Menu File > Build Settings, click Player Settings.
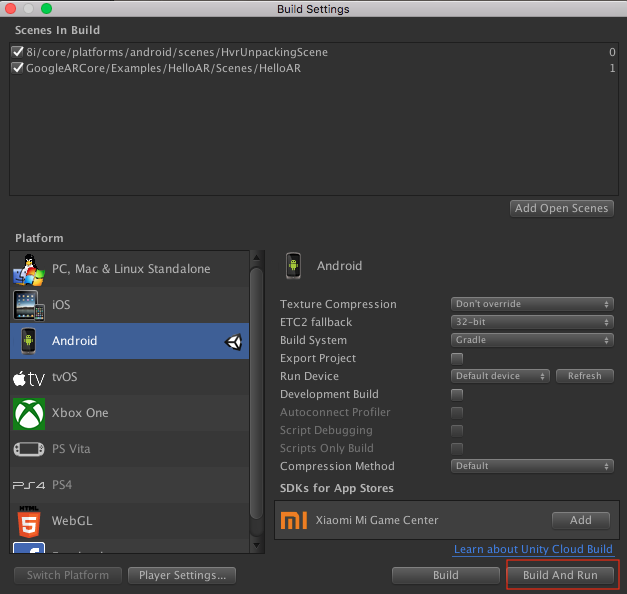
Click Build And Run, select a folder to export the APK. If everything went smooth, you should be to see the APK get exported and automatically deployed to device.
Once the build is up and running, pick up your phone and walk around until a magenta ground is shown, which means you can put your holograms on.
Tap the white grid ground or blue dots to see how hologram works within AR world.
Where to go from now on
- Check out our documentation on all the Components and how they interact with each other.
- Take a look at Google Augmented Reality Design Guidelines.
- Download 8i holograms from https://8i.com/developers/downloads/.